
The steps to making a “vacformed” component are as follows:
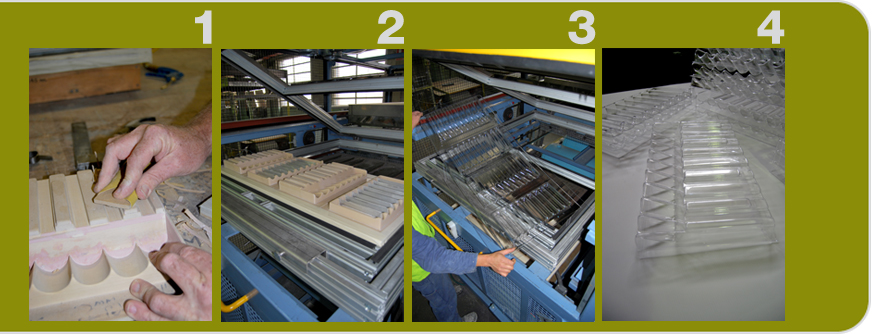
1) A timber “pattern” - a hand crafted prototype tool - is made by our in-house Pattern Maker. A prototype mould can be taken of this for the client to assess. This is done by heating a sheet of plastic in our machines until it becomes soft – “thermoplastic”. It is then sucked over the timber pattern by vacuum. The result is a shell of plastic that has the same outer shape as the timber block. Any further alterations desired are then made to the timber pattern. The moulding off the pattern will not be as clear as production mouldings.
2) Once the design is finalised, we take one further mould from the pattern and pour a hard resin into the hollow side of this. This gives us a very hard production “die” – or “tool”, that will withstand repeated machine cycles. It is hand polished and mounted on a production moulding box. Sometimes we will pour multiple dies for higher quantity production runs, to reduce the overall moulding time of the job. This may be referred to as a “3 up production die”
3) The die is set up in the vacuum forming machine. A production die ensures delivery of consistent high quality mouldings over large production runs. The die is designed from the start for a particular material thickness and type. For example 2mm thick clear PETG. Different plastics shrink and behave slightly differently, so high tolerance mouldings must be designed with this in mind.
4) The finished mouldings are then trimmed. When the part comes off the moulding machine, it has a wide flange on it that needs to be trimmed to your specification. It can be guillotined flush if it has straight edges, Die cut to a shape, or run through a horizontal trim, which leaves no flange at all. The flush guillotine option is usually the cheapest, as it can be done by the machine operator as the part comes off the machine.